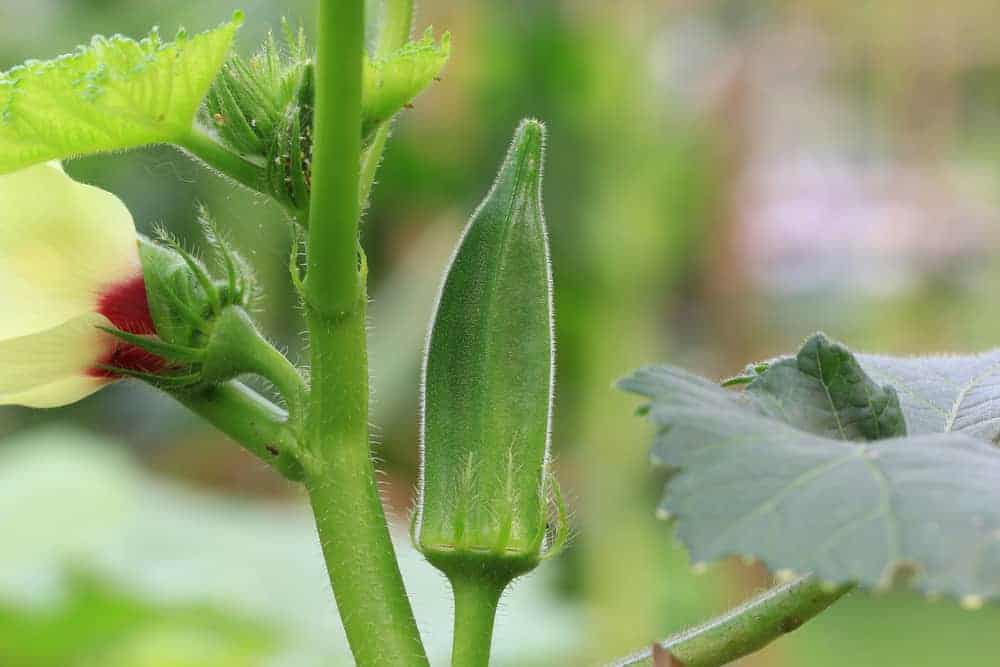
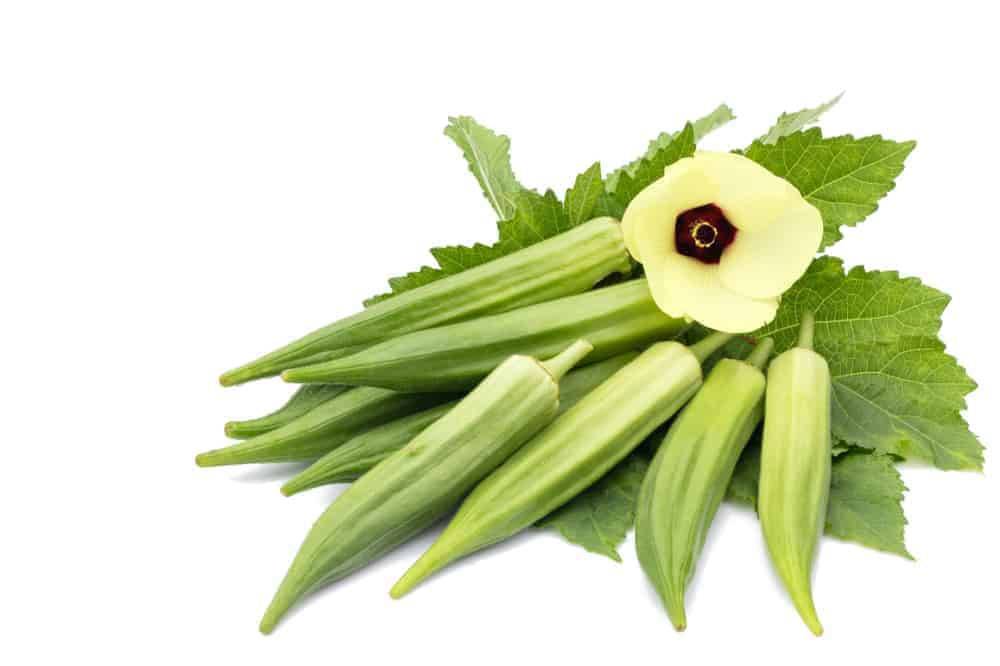
It is not entirely clear if okra (ochro, bhindi, or ladies’ fingers) is South Asian, West African, or Ethiopian origins, but it is well-known that the best regions for cultivation are subtropical and tropical zones throughout the globe. You can harvest this warm-natured hibiscus cousin during summer, and keep doing that as soon as new pods grow in their place.
This fantastic vegetable is popular in the US, especially in the Southern States, since the 1600s, and it is still a staple in their cooking. Moreover, many gardeners use this impressive plant, tall from 2 to 6 feet (0.6 – 1.8 m), as attractive fences for their gardens.
The Best Varieties of Okra
In average, five plants will produce enough pods for most families. It’s up to you to decide which variety your family will like the most.
1. Annie Oakley okra
That is an ideal solution for colder regions. You can collect their angular, bright-green pods approximately seven weeks after planting.
2. Chinese okra
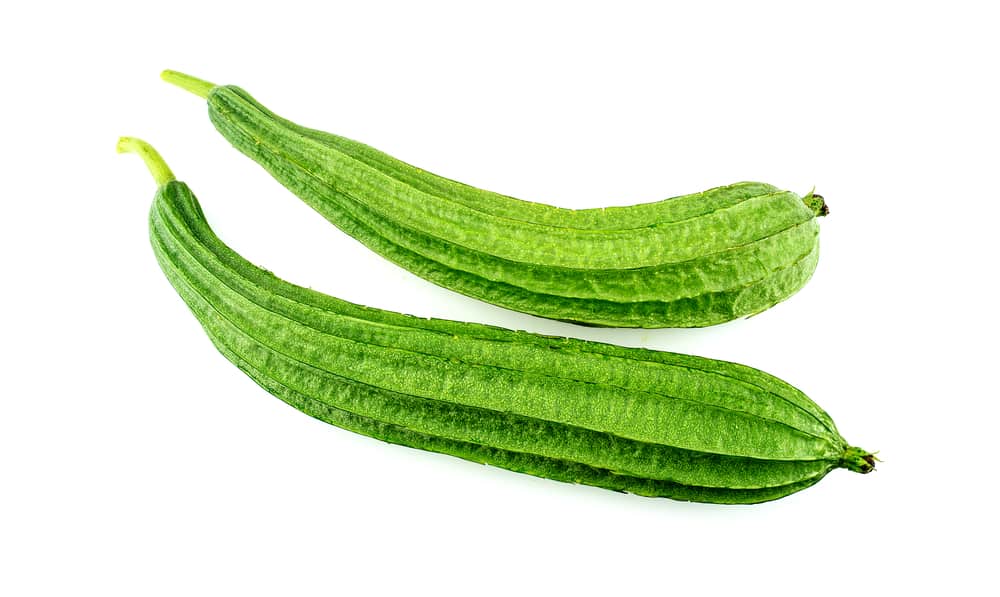
Well-known as ladyfingers or luffa, this okra has extremely long pods and zucchini-like flavor. Wait for collecting this variety until pods are at least 6 to 8 inches (15 – 20 cm) long. I promise you that you will enjoy their tender and spongy creamy-white flesh.
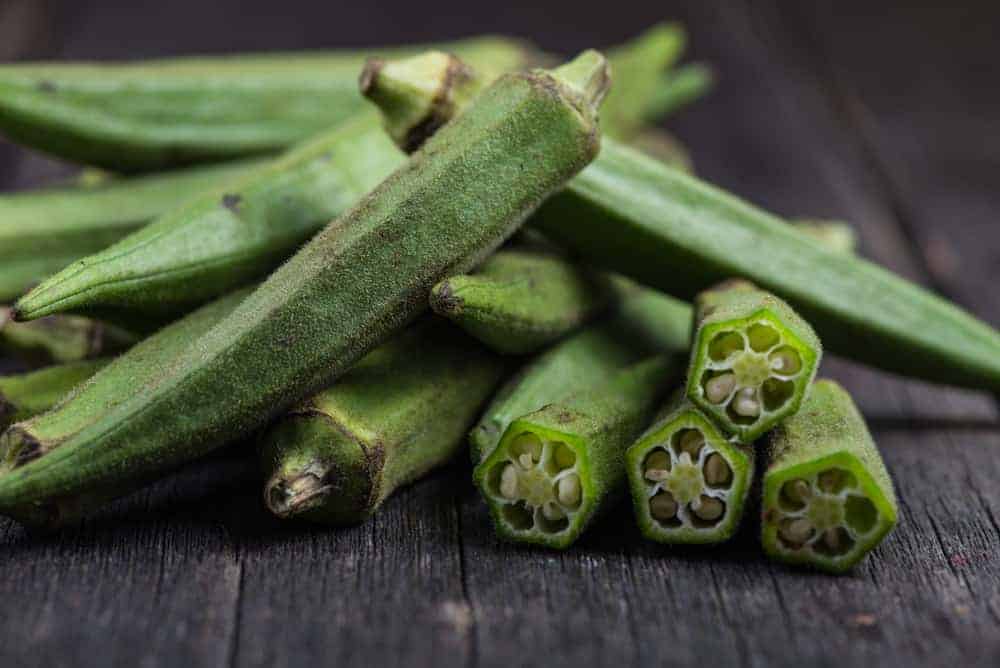
3. Clemson okra
They take less than eight weeks to mature and reach 4 feet (1.2 m) high. I really like their dark-green, angular pods, which are ready for harvest when they are about 2.5 to 3 inches (6 – 7.6 cm) long.
4. Emerald okra
That sturdy plant has turned 70 years these days. Their tender, dark-green, spineless, 8 inches (20 cm) long pods grow on 5 to 8 feet (1.5 – 2.5 m) tall stems. Collect pods approximately 55 days after planting.
5. Lee okra
That dwarf okra is the plant of choice if you have a small garden with limited growing space or want to plant this vegetable in a container. You will love their soft, bright-green pods.
How to Plant Okra in Your Garden
In warm regions
If you live in a warm region, where summers are hot, and winters are mild, you can plant your okra in early spring directly in your garden. It is enough that the last frost pass and the temperatures are not lower than 55 F (13 C) at night.
In this case, there is a possibility to plant two crops, one in the early spring and the second in mid-June. It is enough checking the temperatures of the ground before planting. Also, the temperatures of the air should be at least 60 F (15.5 C), but ideal ones are about 80 F (26.5 C).
In cold regions
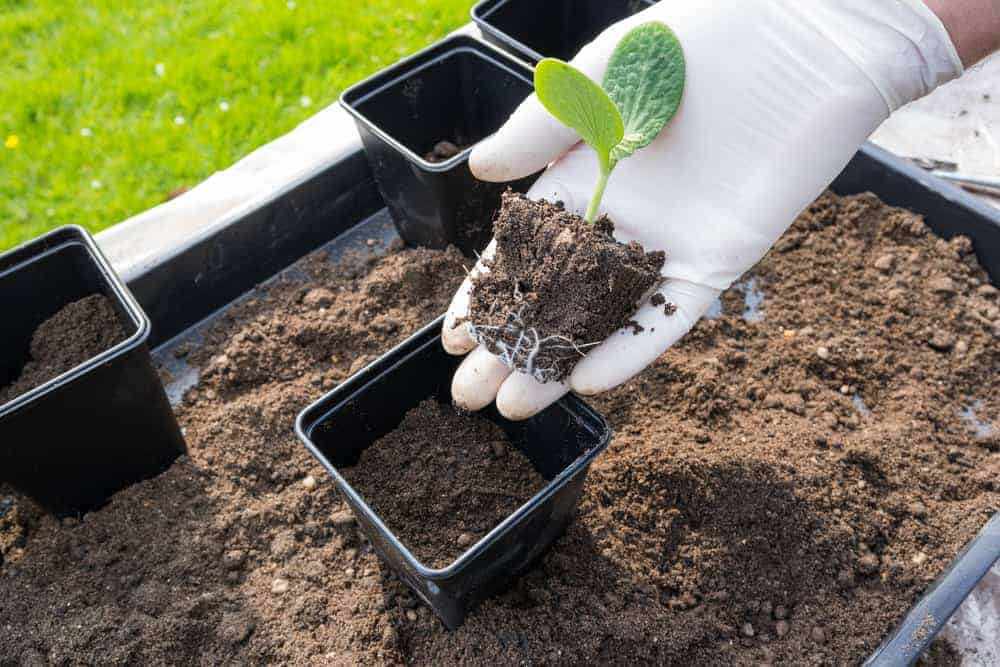
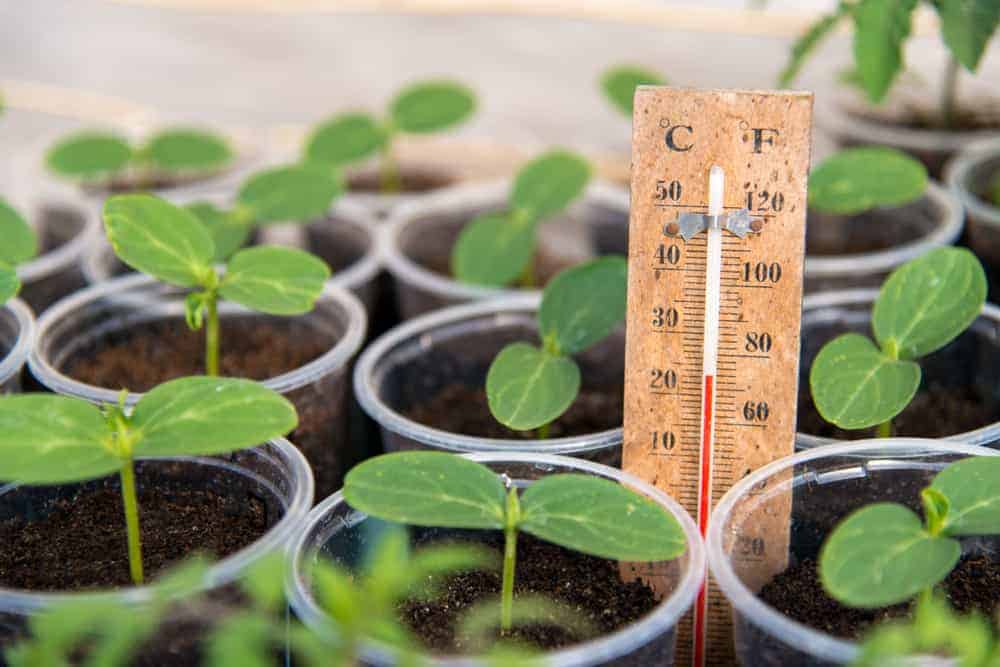
Otherwise, when you live in colder regions, you should start okra seeds indoors, approximately 2 to 3 weeks before the last frost. Afterward, you should transplant seedlings until early summer when the temperatures are adequate and young plants sturdy enough.
When starting seeds inside, you should use well-watered peat seed starter, and place it in a warm, sunny room, with the average temperatures from 65 to 70 F (18 – 21 C), during the period of germination.
The process of planting
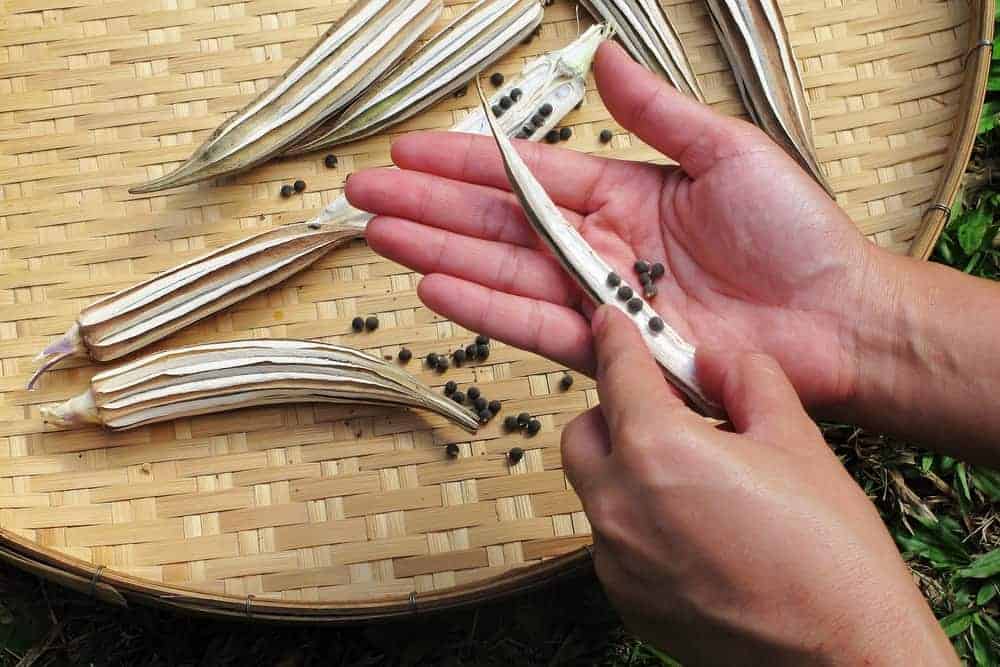
You can purchase seeds in the local store or online, but there is also the possibility to save your own. In general, saving seeds from one plant is enough for the next season, but, if you plan to maintain this particular variety over a few generations, it is better saving seeds from five to ten plants.
Regardless of whether you sow seeds in the pot or directly in the garden, always use fresh ones which you should soak overnight. Place them 0.5 inches (1.25 cm) deep if the soil is light and 1 inch (2.5 cm) deep if the soil is heavy.
Transplanting
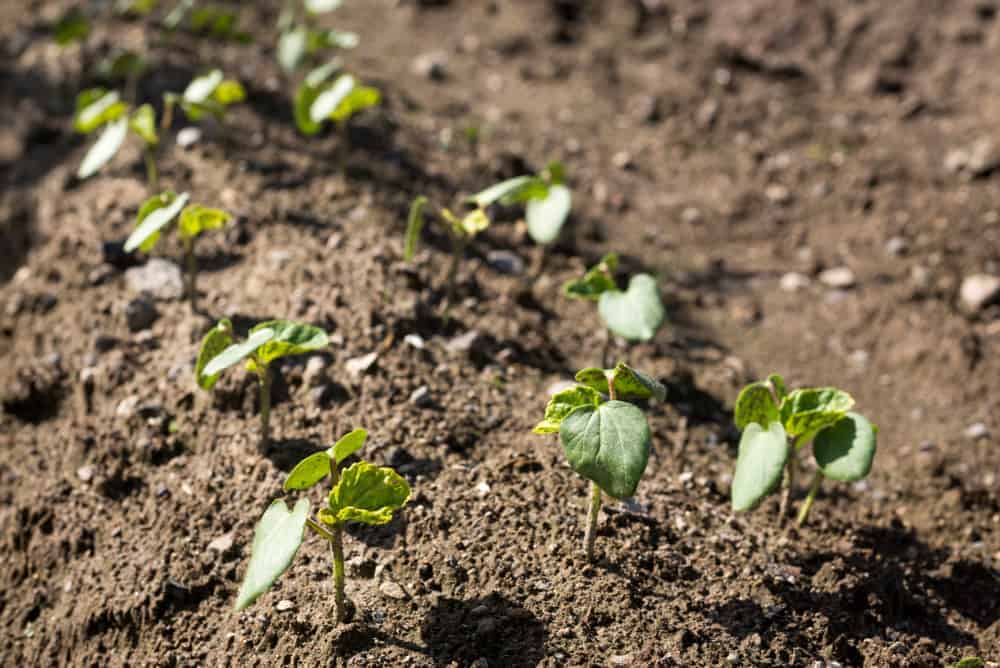
Your seeds will need approximately 6 to 18 days to germinate, depending on the temperature.
When your seedlings are 4 to 6 inches (10 – 15 cm) high, you can transplant them in the garden. Give them enough space, about 1 to 2 feet (30.5 – 61 cm) apart at least, to let new plants thrive comfortably.
Since your okra plants are tall, take care to space out the rows at minimum 3 to 4 feet (0.9 – 1.2 m) apart. That way, your vegetable will grow undisturbed, with plenty of suns and excellent ventilation.
How to Care Okra
Site
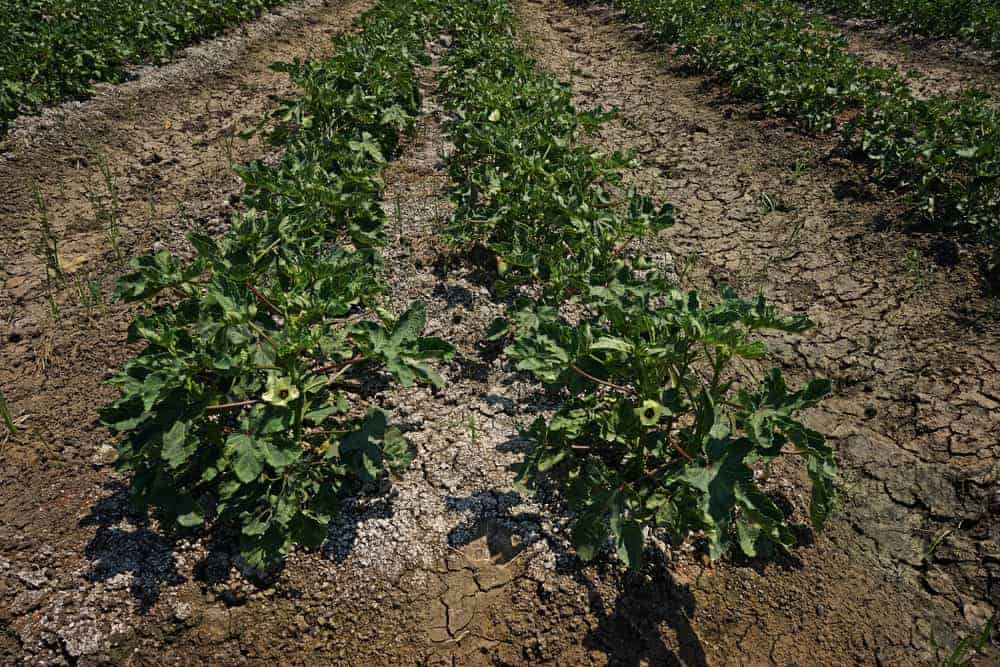
The best space for your okra is a part of the garden where this 3 to 8 feet (0.9 – 2.5 m) tall veggie won’t shade other plants.
Since seedlings have fragile roots, you need to take care not to damage them and to water them thoroughly an hour before planting.
Set those young plants 1 inch (2.5 cm) deep in the ground, about 10 inches (25 cm) apart, while rows should be at least 3 feet (0.9 m) apart.
Soil
The best soil for growing okra is fertile, loose, and well-composted, with pH from 6.5 to 7.6.
Mulching
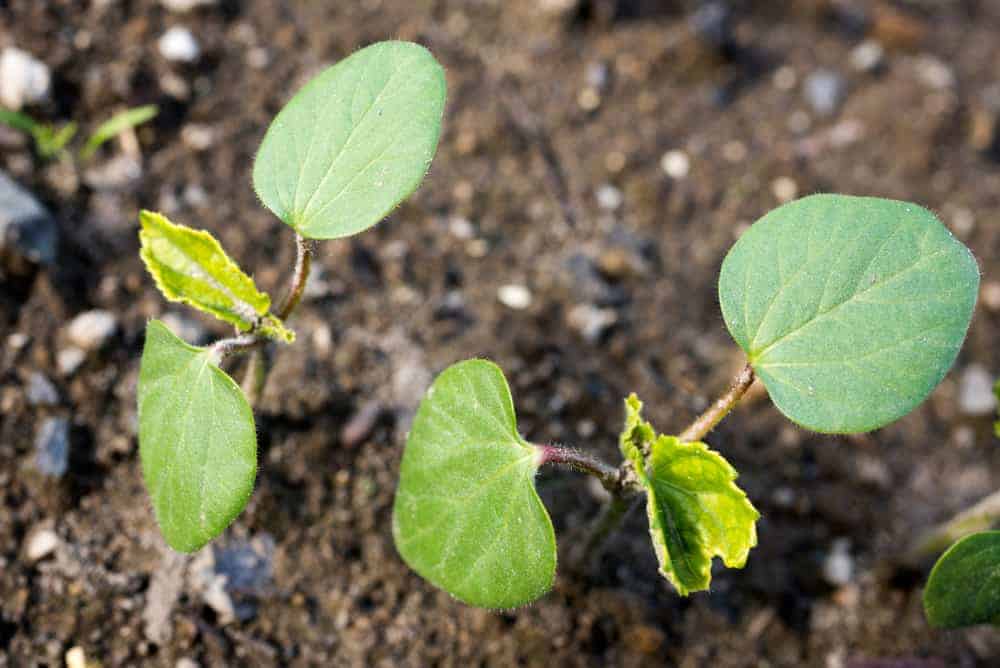
When your seedlings are 2 to 4 inches (5 0 10 cm) tall, thin them and apply a generous layer of mulch in all directions. Take care to make a circle around stems to avoid direct contact with mulch. That way, you will keep your veggies weed-free and moist during dry and hot days.
Light
You won’t go wrong if choosing the sunniest place in your garden for growing okra. These plants need at least 8 hours of full sun a day.
Temperatures
Okra requires the temperatures of at least 60 F (15.5 C) during the night and over 85 F (29.5 C) during the day. If you live in the North, don’t plant okra before late June, to provide ideal conditions for pods when they appear two months later.
Watering
Okra can withstand drought. However, you should provide frequent watering during the period of germination. After flowering, your okra will be satisfied with 1 inch (2.5 cm) of water a week.
Water your plants early in the morning, and don’t let the soil stay soggy during the night to avoid rotting. Also, keep the foliage away from water to prevent its burning during hot days.
Fertilizing
Your okra will need plenty of nutrients to thrive, and you should provide compost or natural fertilizer after thinning the young seedlings, when the first pods start forming, and once more throughout summer.
Adding surplus of compost may hurt your veggies instead to help them. Adding a half-cup of slow-release fertilizer (5-10-10) per 20 sq ft (1.85 m2) will be enough.
Thinning

Wait for the seeds to sprout and grow approximately 3 inches (7.6 cm) high, and then start thinning the smaller seedlings. The goal is to leave the strongest ones and provide the space of at least 1 to 2 feet (30.5 – 61 cm) between them with rows 3 feet (0.9 m) apart.
Weeding
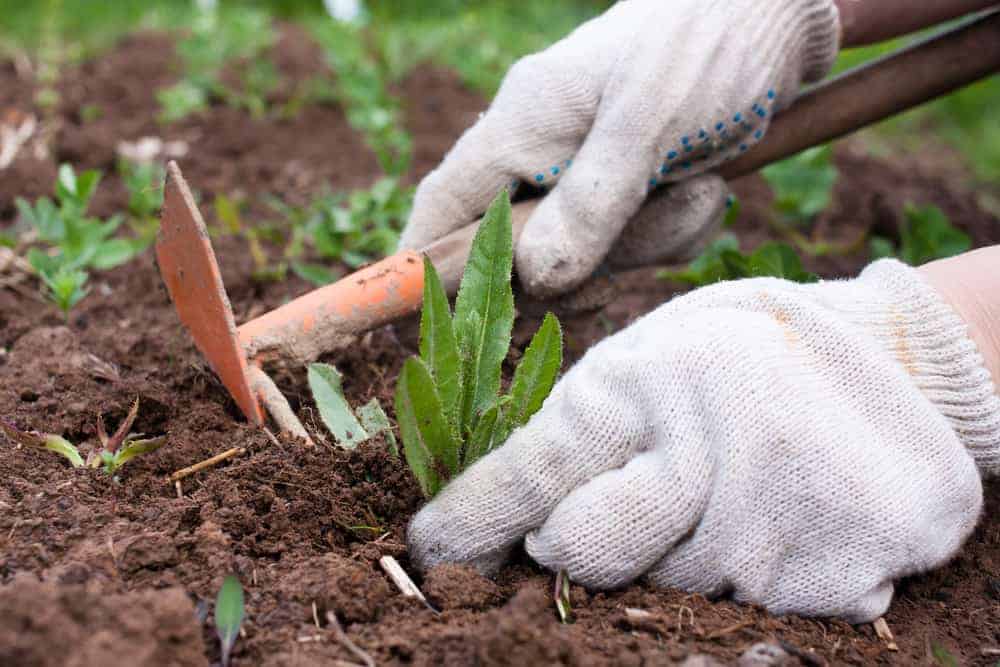
Regular weeding, especially while your okra is still young, will prevent unwanted grass from sprouting and damage your vegetable.
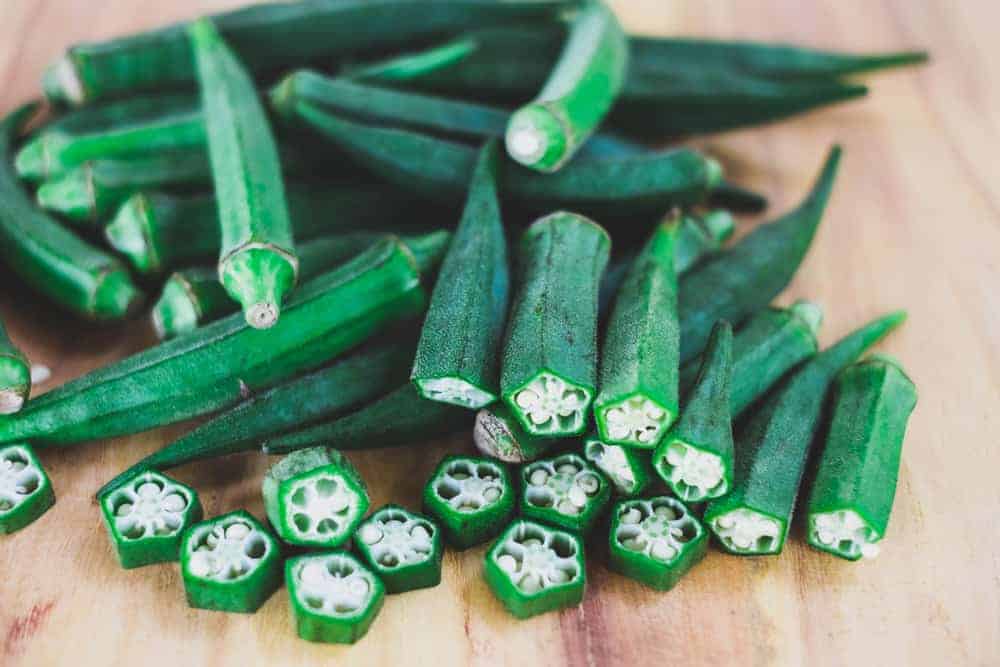
How to Harvest Okra
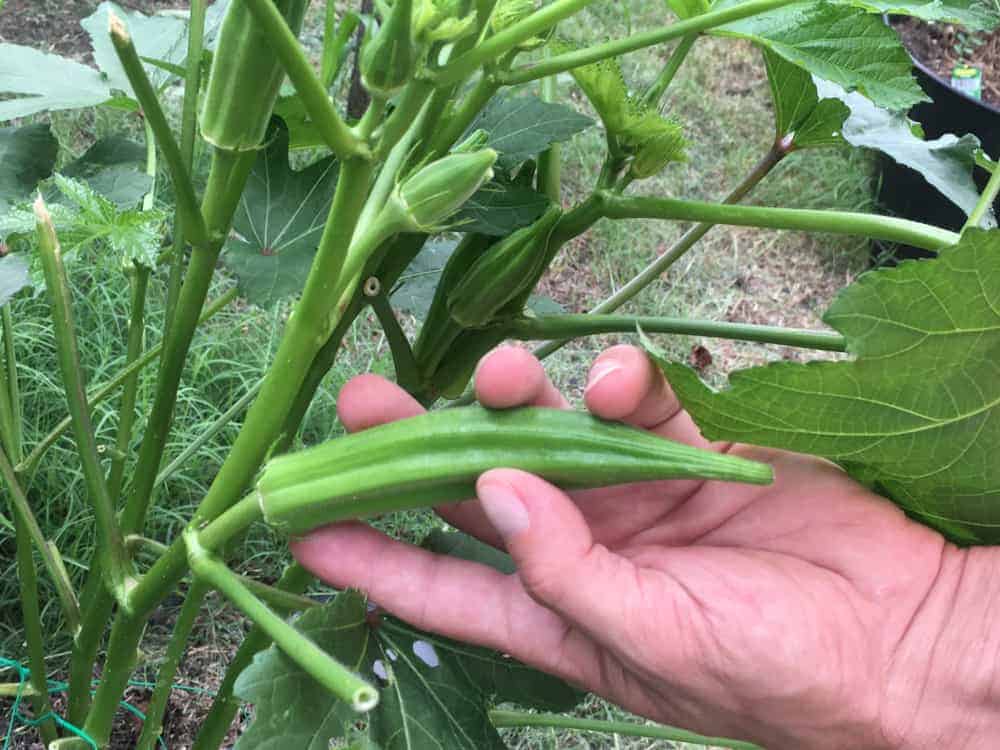
The okra pods will start to grow approximately two months after planting. Most varieties reach maturity in 50 to 65 days. The process of harvesting is quite simple.
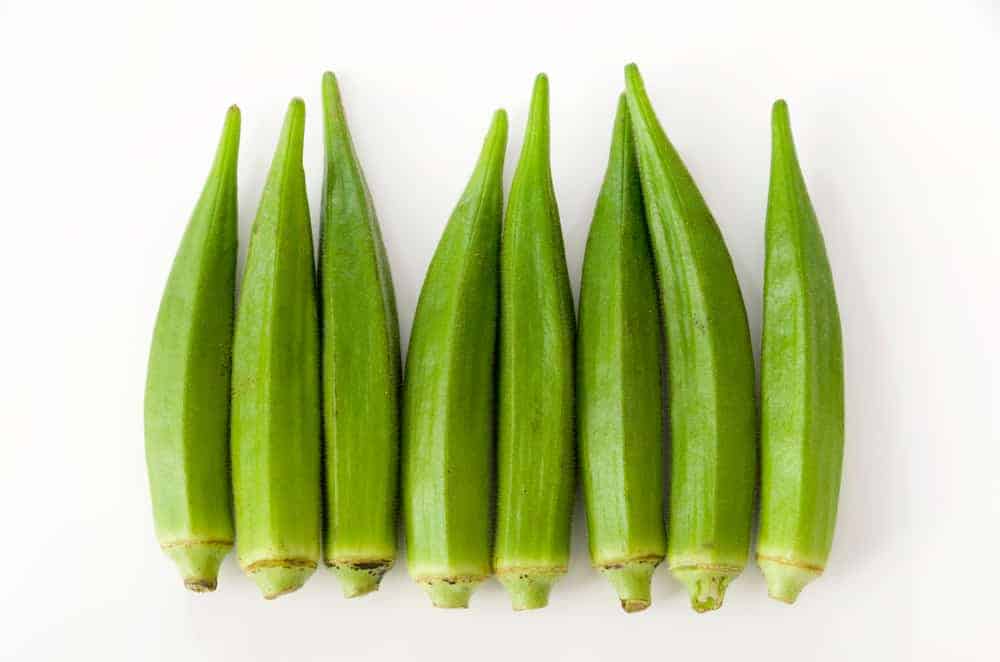
Once they mature and become 2 to 4 inches (5 – 10 cm) long, you can start collecting. After a while, you can come back and harvest new pods as soon as they grow up in the same place.
In average, you can keep picking up your crop every other day for ten to twelve weeks. That way, you will actually encourage okra’s fast re-growth. Take care to collect pods before they become too big, sturdy, and woody.
Always use scissors or a knife to cut the pods above the caps, to prevent damaging the stems and to leave the place for emerging the new fruits from the same spot.
Keep harvesting your vegetable throughout the summer until okra stops producing new pods before the first frost. Always wear gardening gloves while cutting these veggies since they are often covered with tiny spines which may irritate sensitive skin. Don’t forget to add remaining mature pods to your compost pile.
How to Store Okra
You can cook your okra right away after harvesting, but you can also put them into the fridge and use pods for five to seven days.
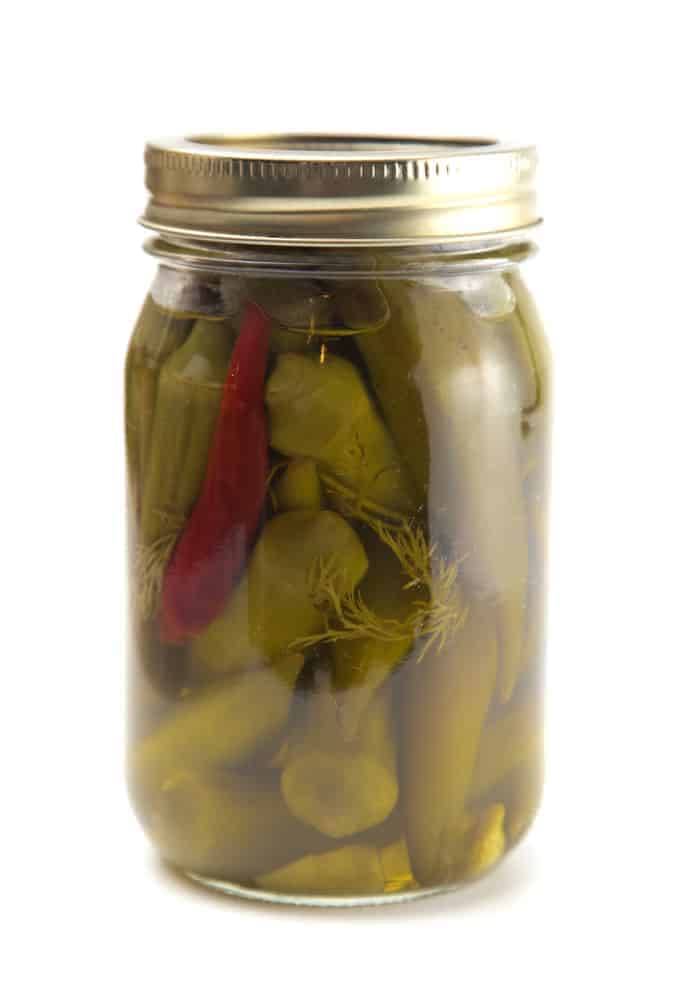
There is a possibility to wrap pods in some fabric or simply hung them in mesh bags to dry until becoming brittle. Pickling okra in salty brine is an excellent way to preserve the full flavor and texture of your pods for months.
If you prefer to freeze your vegetables, you can put blanched pods into plastic bags and keep them in the freezer throughout the winter.
When you decide to store your okra seeds, do it in a cold, dry, and dark place, and it will be useful for up to three years.
Okra Pests and diseases
Enation leaf curl disease

This viral infection causes the occurrence of small pin-head enations on the underside of the leaves, which becomes rough over time. Once this disease occurs, the foliage becomes smaller and curled, and fruits may grow deformed.
Yellow vein mosaic disease
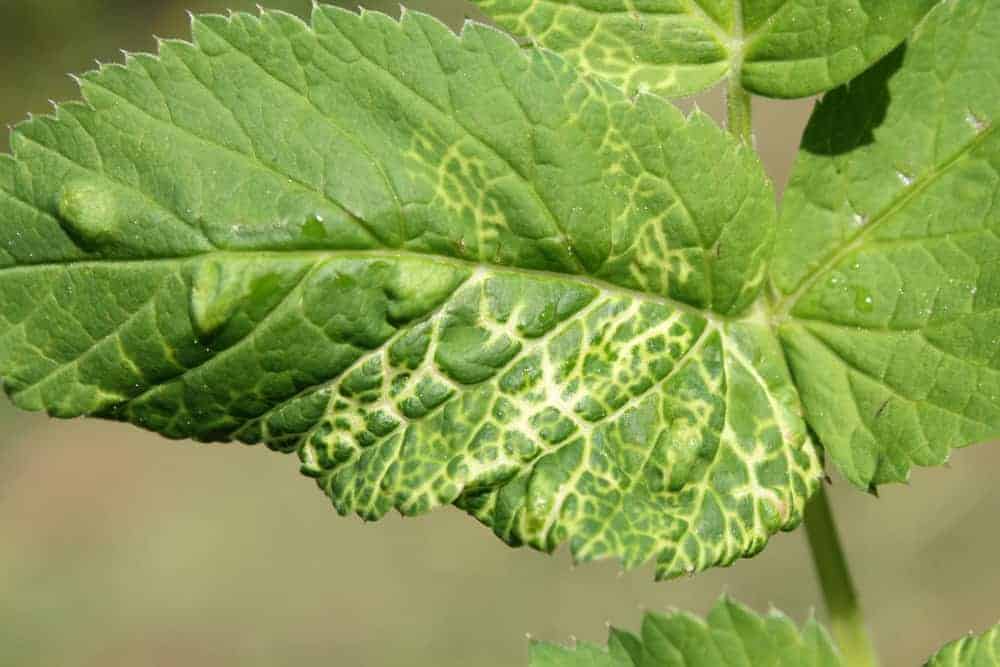
The virus will cause green or yellowish patches on the foliage. While the disease progresses, veins on the leaves will transform to thick and distorted eventually.
Your yields will be ruined, especially if infection occurs in the early stage of growth. The result will be yellow and tiny pods. Prevent this disease by using certified seeds and resistant varieties of okra. Appropriate crop rotation and weeding will also be helpful.
Charcoal rot
This fungal disease is responsible for discoloration of stems and the occurrence of numerous black sclerotia in affected plants’ tissue. Since this infection is spread via microsclerotia through the ground, the only way to avoid it is to rotate the crops properly.
White mold
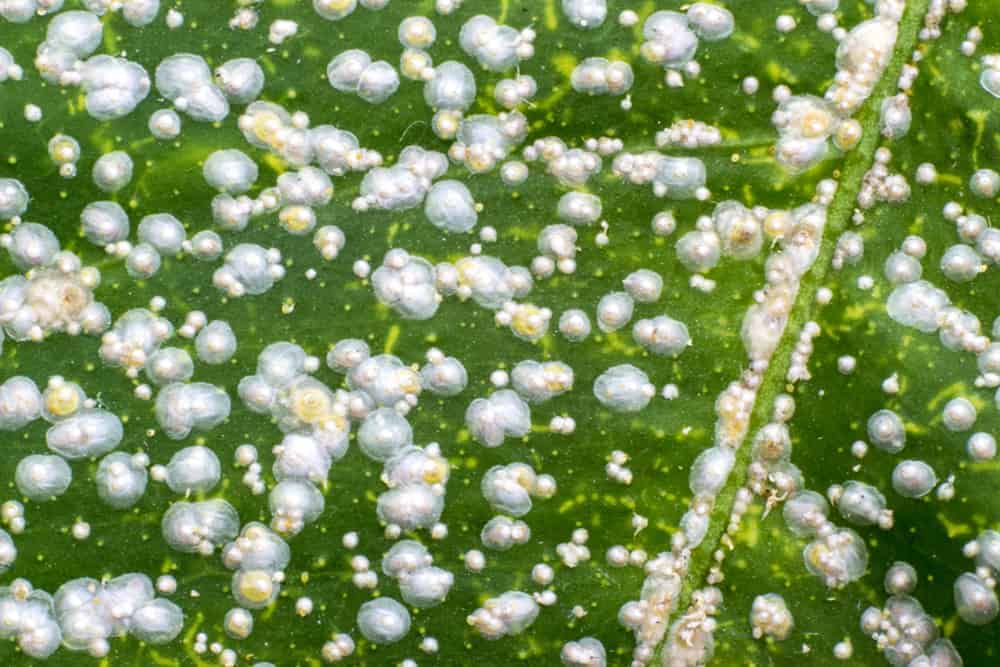
Fungi, which cause this disease, may survive in the ground up to five years. Spread by wind, infected seeds, and water, they will affect okra flowers, foliage, and pods. You will spot white, cotton-like changings on different parts of your plants.
Prevent the spreading of fungi by avoiding excessive nitrogen fertilizer, plant your vegetable in wide row spacing, and rotate crops regularly.
Aphids
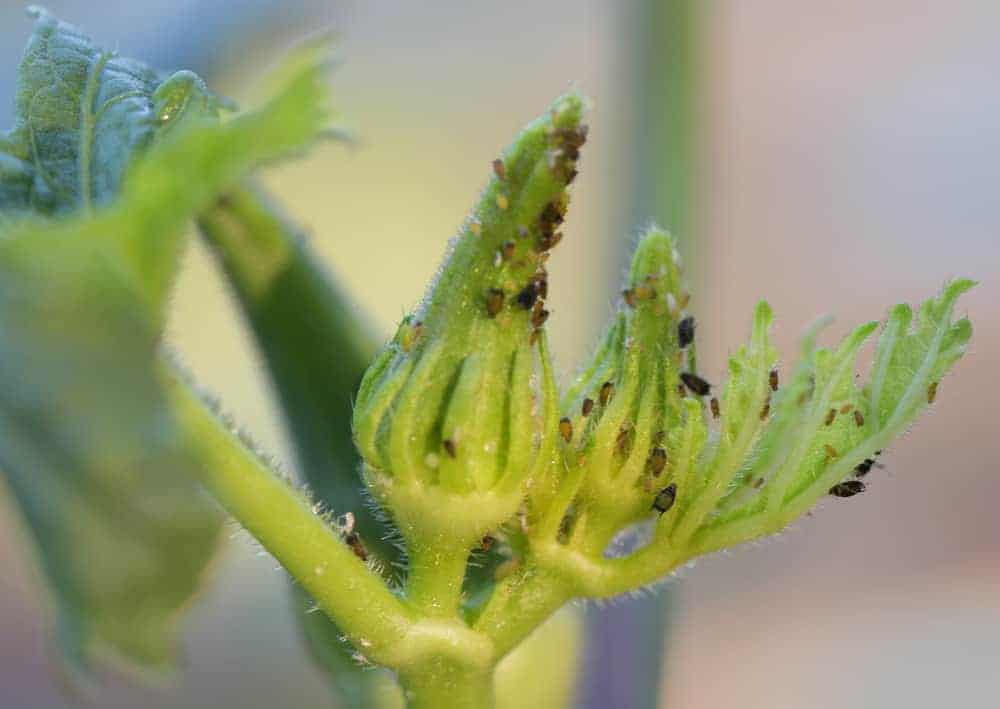
You can easily notice their colonies and sticky honeydew they excrete on the underside of foliage. Get rid of those bugs by squashing their colonies with your own hands. If you have noticed insects on time, while just a few leaves or shoots are affected, you can save your crop. Otherwise, you will need to destroy the entire yields.
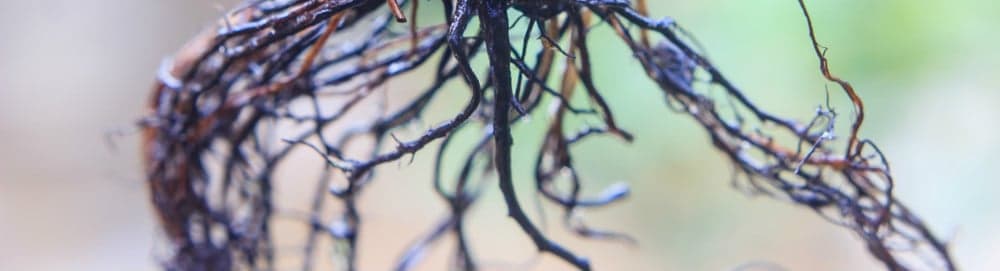
Root-knot nematode
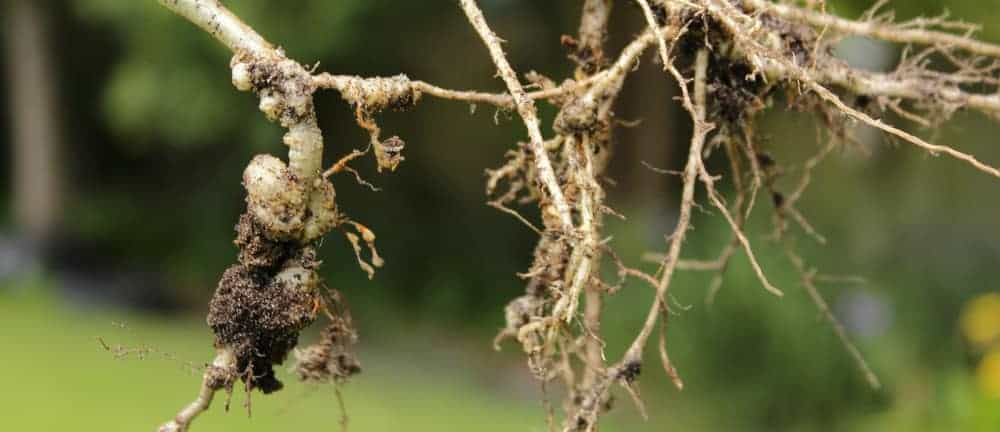
You may notice knots on roots 1.5 inches (3.8 cm) in diameter a month after planting, especially if you grow your okra in sandy soils. If you know that those nematodes exist in the ground, you should plant resistant varieties of okra and check their roots occasionally.
Thank you so very much for complete useful direction and informational guid. I live in Houston Texas. I love Okra but I have a small patio and forced to plant in pots. Last spring I planted maybe about 50 seeds in several times they germinated and died all except one survived which I engined during summer. This year I did the seeds and also bought plants all died too.
Bought again now I have six double seeded plants and watching them carefully changed their little cups after one week to bigger one with Mirakel grow and crossing my fingers that they survive
Your instructions are great and I greatly appreciate your kindness to help us.
Ps : do you sell seeds and also fig cuts I am interested to buy plants from you if possible.
My email
fafa66mail@gmail.com
Thank you again